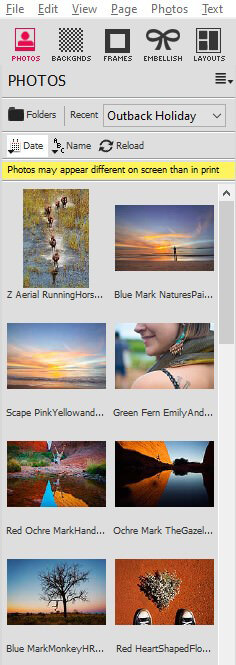
Photos Panel
The Photos Panel is one of the five Content Panels on the left side of the software interface. You can use the Photos Panel to locate and access all the photos on your computer, then add them to your project.
You can access the Photos Panel by clicking on the Photos icon in the Content Panel sub-menu available in Sort View, Layout View and Cover View.
Accessing photos in Folders
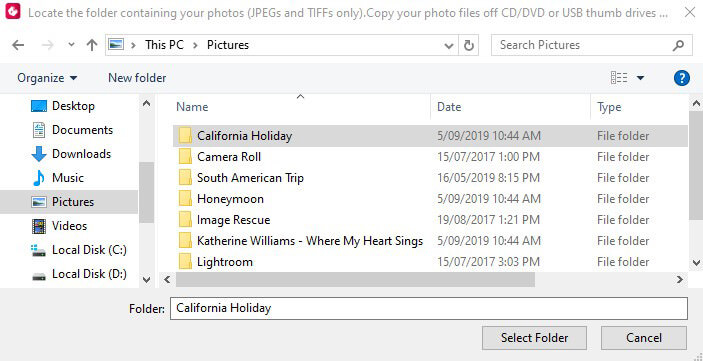
Click on the Folders button in the Photos Panel sub-menu and the Browse for Folder box will appear. Use this to search your computer then click the OK button when you have found the folder you want. The Photos Panel will reload with new content from the folder you have chosen. Use the scroll bar's down arrow to view all the photos in the folder.
If you can't find the photos you want to add, simply click the Folders icon again to navigate to and select another folder on your computer.
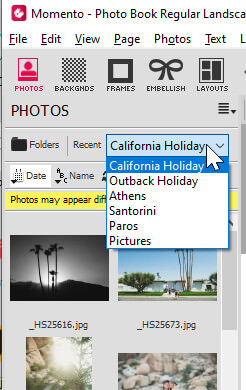
Recent Folders menu
If you’re working on a project that uses photos from many folders, use the Recent folder shortcut to quickly access them. Click the down-arrow next to Recent to see a list of folders you have recently viewed, and select your preferred folder. Note: The Photos panel only photos from the folder you have selected.
Enlarge a thumbnail photo
Double click any photo in the Photo Panel to enlarge it to full screen view, then click the Esc (Escape) button to return to the main interface.
Sort the Photos Panel
You can make the photos appear in alphabetical order or date, whichever suits the way you have named your files.
Sort by Name
By default the Photos Panel displays photos in alphabetical order according to the filename. This is handy when you have named photos according to a theme, person or event i.e. when creating a family history you may name each photo according the family member’s first name (Harry_01.jpg, Harry_02.jpg, Mary_03.jpg), or your holiday photos according to destination (India_01.jpg, Japan_06.jpg or Japan_07.jpg).
Sort by Date
You can change the order of the photos in the Photo Panel by clicking the Date button to sort by creation date instead (the date the photo was taken). This can be useful when the chronological sequence of the photos is important i.e. when creating a family history you may name photos according to the year they were taken (1962_School.jpg, 1963_NZHoliday.jpg, 165_Wedding.jpg)
Add a photo
To add any photo to a page you need to first select the image then drag-and-drop it in to position on the Canvas. To learn how to add a photo in Sort View click here. To learn more about adding photos to your project, see the Add a Photo sections in Layout View and Cover View.