Text & Captions
Types of Text
You may wish to add text, chapter titles, headings, footers, captions or any kind of text to your project to enhance or add to the photos or design, and the Momento software makes it easy. You can enter text in any size or font you wish (we call this Custom Text) or you can use our five pre-defined Text Styles, or a combination of both. Both options make use of a Text Box that you enter the letters or words in to, then set the Style, size, font, alignment, colour and other characteristics of the text.
Text Styles
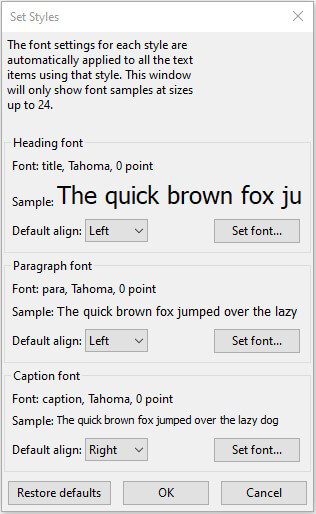
If you want to add chapter headings, page number, footer text or any kind of text to various pages without having to set the font size, colour and alignment every time, you can use the pre-defined Text Styles. There are four Text Styles with these default settings:
- Heading Font: Tahoma, 18pt, left-aligned
- Paragraph Font: Tahoma, 10pt, left-aligned
- Caption Font: Tahoma, 8 point, right-aligned
- Cover Font: Tahoma, 24 point, centre-aligned (for Spine text)
Heading Text
Generally, large type that can provide a heading for a page. Heading text can be added to any page in any position.
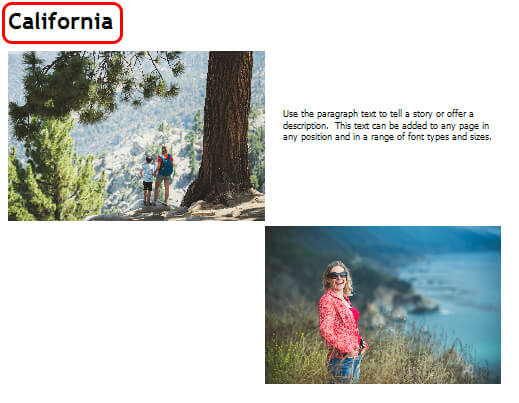
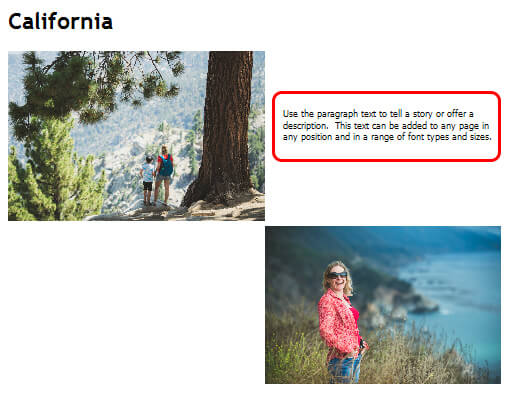
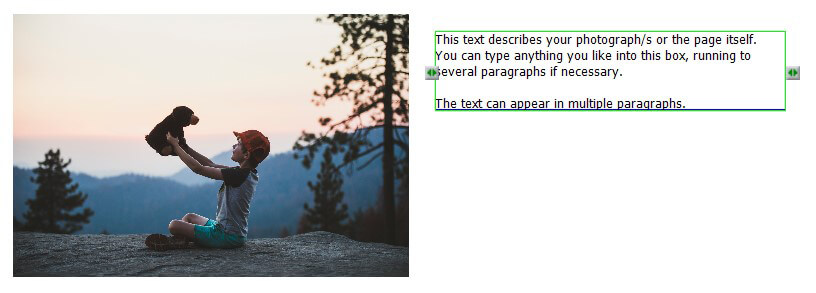
Paragraph text
Generally, regular type to tell a story or offer a description. Paragraph text can be added to any page in any position.
Caption text
Generally, small type for labelling a single photo. Caption text is only available directly under a photo.

Cover Text
Generally, extra large type for a cover page.
Custom Text
This is any text style you wish to use, you set all the characteristics yourself. This text can be any size, font, style and position on the page, even on top of a photograph.

To change Text Style settings
There are three ways you can change the settings of any Text Style:
- click the Set Styles button in the Layout View menu bar
- select the Set Styles button in any Text Box
- go to the Text Menu and select the Set Styles option
The Set Styles box appears and allows you to change default settings for Alignment and Font. Remember that changes will apply to all text boxes in your project with the particular Text Style.
Add Text
To add text in Layout & Cover View
Heading, Paragraph, Cover, Caption and Custom text can be added in Layout View or Cover View in this way:
- Click the Add Text button at the top right of the screen, or press Ctrl/Comm+P
- Click a spot on the page where you’d like your text to appear
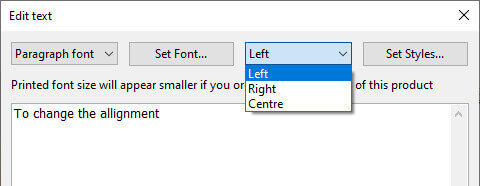
- The Edit Text box will open
- Click the Set Font button to choose your Font, size, colour
- Choose Left, Right or Centre alignment for your text via the drop down menu options
- Type in your text
- Click the OK button to return to your design
Note: You can type your text first but if you want to set the font and alignment afterwards you need to select all the text to apply the change.

.jpg)
To add Heading or Paragraph text in Layout View
- Go to the Text menu
- Select Add heading text or Add paragraph text
- Proceed to Step 2 above
- You will be able to skip Step 4
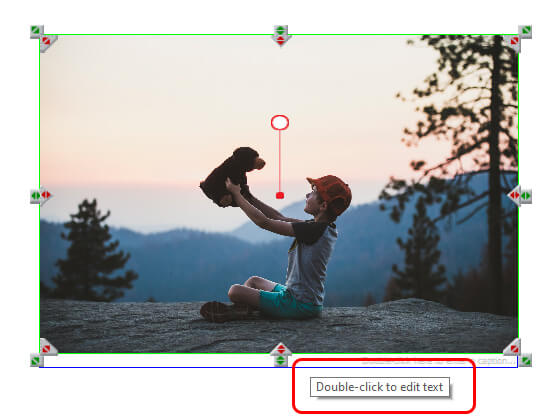
To insert Caption Text in Layout View
Adding caption text is a slightly different process as captions are directly related to a photo, and can only be positioned underneath a photo.
- Click to select a photo in Layout View
- Double-click on the Double-click to edit caption tab
- Proceed to Steps 4, 5 and 6 above
Note: The caption will match the width of the photo and will wrap to a second or third line if text is wider than the photo
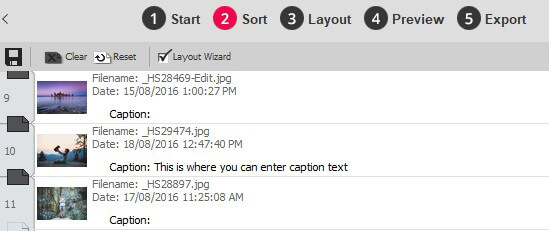
To add text to your page in Sort View
To add caption text in Soft View
- Click to the right of the word Caption visible with each photo
- Type your text in to the Text Field
- Press the Enter key on the keyboard
- The text will appear as a caption when you move through to Layout View
- Note: Only caption text can be added in Sort View
Add Captions
Just as newspapers include a text description below a photograph to explain the content of the photograph, you can include captions below your photos. Captions can be used to describe where the photo was taken, when it was taken, who appears in it, or if you’re creating a catalogue you could use the photo’s filename for an easy reference point.
To add caption text in Layout View, click on the Double Click Here tab underneath a photo. To add caption text in Sort View type your caption text in the Caption field.
Change Text Format
Move text to a different position
A text box can be easily moved from one place on a page to another:
- Click anywhere in the middle of an existing text box and hold down the mouse button
- Drag the text box to the new position on the page
Note: It is possible to drag a text box wholly or partially on top or in front of an existing photo but not behind a photo.
Resize a Text Box
Select the Text Box and a handle will appear on either side of the Text Box. Drag the handle out toward the edge of the page to expand the Text Box until your text fits on one line. Likewise, you can drag the handle inward to create a smaller Text Box and have the text appear on multiple lines.
- In Layout View, click once in the Text Box you want to resize
- Click either resize handle on the side of the Text Box
- Drag the handle to the left or right
- The Text Box will redisplay with your new width setting
Change Alignment
You can align your text in the text box to the Left, Centre or Right. There are three ways you can do this:
- Right click on the text box and select Text Alignment > Right
- Click on the text, go to the Text Menu and select Text Alignment > Left, Centre or Right
- Double click on the Text
- The Text Box will open
- Select Left, Centre or Right from drop down menu
Note: You can right click by using the right button on your mouse rather than the left button
Change Font characteristics
Momento has made a number of free fonts available with the software, and you can also use any font installed on your computer. There are various characteristics that you can adjust to create more interesting or stylish page design. Font characteristics include:
For a more interesting or professional-looking photobook, it is sometimes desirable to change text's:
- font (typeface)
- size
- colour
- style (bold or italics)
- justification (left, right or centred)
- other effects (underline or
strikeout)
To change font characteristics:
- Click the Set Font button.
- The Font box appears
- Set the font (typeface), style (bold, italics, or both), size (in points), colour, or effects (strikeout or underline)
- Click the OK button when you are happy with your changes
Note: If you enlarge a font size for a Text Style you must check all the pages to ensure that no text box has extended beyond the edge of a page or over another element on the page.
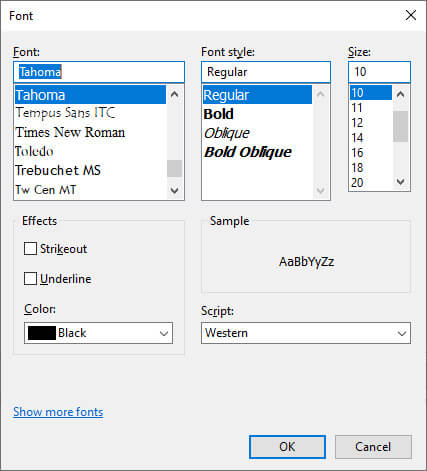
Image Credits: Heartstory